Introduction to Nanaimo Bars
Ah, Nanaimo bars! Just the name brings a smile to my face. These delightful no-bake treats are a sweet escape from the chaos of everyday life. As a busy mom, I know how precious time can be, and this recipe is a quick solution for those moments when you need a little indulgence without the fuss. With layers of chocolate, custard, and a crumbly base, Nanaimo bars are sure to impress your loved ones. Trust me, once you make these, they’ll be asking for seconds—and you’ll be happy to oblige!
Why You’ll Love This Nanaimo Bars
Nanaimo bars are the perfect treat for anyone juggling a busy schedule. They come together in just 20 minutes, making them a quick and satisfying dessert option. Plus, there’s no baking involved, which means less mess and more time to enjoy with family. The rich layers of chocolate and custard create a flavor explosion that will have everyone raving. Trust me, these bars are a delightful way to sweeten your day!
Ingredients for Nanaimo Bars
Gathering the right ingredients is the first step to creating these delicious Nanaimo bars. Here’s what you’ll need:
- Unsalted butter: This adds richness and helps bind the base together. Make sure it’s softened for easy mixing.
- Granulated sugar: Sweetness is key! It balances the flavors and gives the bars a delightful texture.
- Unsweetened cocoa powder: This is what gives the bars their chocolatey goodness. Opt for high-quality cocoa for the best flavor.
- Graham cracker crumbs: These create the crumbly base. You can use store-bought or crush your own for a fresher taste.
- Shredded coconut: This adds a chewy texture and a hint of tropical flavor. If you’re not a fan, feel free to leave it out.
- Custard powder: This is the secret to the creamy custard layer. If you can’t find it, instant vanilla pudding mix can be a good substitute.
- Powdered sugar: This sweetens the custard layer and gives it a smooth consistency. It’s essential for that melt-in-your-mouth experience.
- Milk: Just a splash helps to combine the custard layer ingredients. You can use any milk you prefer, including dairy-free options.
- Semi-sweet chocolate: This is for the top layer. If you want a richer taste, dark chocolate works beautifully too.
- Additional unsalted butter: Used for melting with the chocolate, it adds a glossy finish to the top layer.
For exact measurements, check the bottom of the article where you can find everything listed for easy printing. Happy baking!
How to Make Nanaimo Bars
Now that you have all your ingredients ready, let’s dive into the fun part—making these delicious Nanaimo bars! Follow these simple steps, and you’ll have a delightful treat in no time.
Step 1: Cream the Butter and Sugar
Start by taking a medium bowl and adding your softened unsalted butter and granulated sugar. Using a hand mixer or a sturdy spoon, cream them together until the mixture is light and fluffy. This step is crucial as it creates a lovely texture for your base layer. Trust me, the fluffier, the better!
Step 2: Combine Dry Ingredients
In the same bowl, add the unsweetened cocoa powder, graham cracker crumbs, and shredded coconut. Mix everything together until well combined. The cocoa powder will give your base that rich chocolate flavor, while the graham cracker crumbs provide the perfect crunch. It’s like a little party in your bowl!
Step 3: Press the Base Layer
Now, it’s time to press this mixture into the bottom of a greased 8-inch square pan. Use your hands or the back of a measuring cup to ensure it’s packed tightly and evenly. This base layer is the foundation of your Nanaimo bars, so make sure it’s nice and firm. You want it to hold up when you cut into those delicious squares!
Step 4: Prepare the Custard Layer
In a separate bowl, mix the custard powder, powdered sugar, and milk until smooth. This custard layer is what makes Nanaimo bars so special! Spread this creamy mixture over the base layer, making sure it’s even. It’s like adding a soft, sweet blanket on top of your chocolatey foundation.
Step 5: Melt the Chocolate
In a small saucepan, melt the semi-sweet chocolate and additional unsalted butter over low heat. Stir continuously until it’s smooth and glossy. This chocolate layer is the crowning glory of your bars! If you prefer a richer flavor, feel free to swap in dark chocolate. It’s a game-changer!
Step 6: Assemble the Bars
Once your chocolate is melted, pour it over the custard layer. Use a spatula to spread it evenly, ensuring every inch is covered. This is where the magic happens! The layers come together beautifully, creating a stunning treat that’s hard to resist.
Step 7: Chill and Cut
Now, it’s time for patience. Refrigerate your assembled bars for at least 2 hours. This chilling time allows the layers to set properly. Once they’re firm, take them out and cut them into squares. For clean edges, use a sharp knife and wipe it between cuts. Voilà! You’ve just made your very own Nanaimo bars!
Tips for Success
- Make sure your butter is softened for easy mixing.
- Use a sharp knife to cut the bars for clean edges.
- Chill the bars thoroughly before cutting; this helps them hold their shape.
- Experiment with different chocolate types for unique flavors.
- Store leftovers in an airtight container to keep them fresh.
Equipment Needed
- Medium bowl: For mixing ingredients. A large mixing bowl works too.
- Spatula: Essential for spreading layers. A butter knife can be a good substitute.
- 8-inch square pan: For setting the bars. Any similar-sized dish will do.
- Small saucepan: For melting chocolate. A microwave-safe bowl is a great alternative.
- Sharp knife: For cutting the bars. A pizza cutter can also work in a pinch.
Variations of Nanaimo Bars
- Nutty Delight: Add chopped nuts like walnuts or almonds to the base layer for an extra crunch and flavor.
- Peanut Butter Twist: Swirl in some creamy peanut butter into the custard layer for a deliciously nutty variation.
- Vegan Option: Substitute the butter with coconut oil and use dairy-free chocolate to create a vegan-friendly treat.
- Mint Chocolate: Add a few drops of peppermint extract to the chocolate layer for a refreshing minty flavor.
- Fruit Infusion: Incorporate dried fruits like cranberries or apricots into the base for a fruity twist.
Serving Suggestions for Nanaimo Bars
- Pair with a hot cup of coffee or tea for a delightful afternoon treat.
- Serve alongside fresh berries for a pop of color and freshness.
- Dust with powdered sugar before serving for an elegant touch.
- Present on a beautiful platter to impress your guests.
- Enjoy with a scoop of vanilla ice cream for an indulgent dessert experience.
FAQs about Nanaimo Bars
As you embark on your Nanaimo bars journey, you might have a few questions. Here are some common queries I’ve encountered, along with helpful answers to guide you along the way.
Can I make Nanaimo bars ahead of time?
Absolutely! Nanaimo bars are perfect for making ahead. Just store them in an airtight container in the refrigerator for up to a week. They actually taste even better after a day or two as the flavors meld together.
What can I use instead of custard powder?
If you can’t find custard powder, instant vanilla pudding mix is a great substitute. It will give you a similar creamy texture and sweetness in the custard layer.
How do I store leftover Nanaimo bars?
To keep your Nanaimo bars fresh, store them in an airtight container in the refrigerator. They’ll stay delicious for about a week, but I doubt they’ll last that long!
Can I freeze Nanaimo bars?
Yes, you can freeze Nanaimo bars! Just wrap them tightly in plastic wrap and then place them in a freezer-safe container. They can be frozen for up to three months. Thaw them in the fridge before serving.
What’s the best way to cut Nanaimo bars?
For clean cuts, use a sharp knife and wipe it with a damp cloth between cuts. This will help you achieve those perfect squares without the layers squishing together. Enjoy your beautiful creation!
Final Thoughts
Making Nanaimo bars is more than just whipping up a dessert; it’s about creating sweet memories with your loved ones. The joy of layering those rich flavors and the anticipation of that first bite is simply delightful. Whether you’re sharing them at a family gathering or enjoying a quiet moment with a cup of tea, these bars bring a touch of happiness to any occasion. Plus, the no-bake aspect means you can indulge without the stress of turning on the oven. So, roll up your sleeves and dive into this delicious adventure—you won’t regret it!
PrintNanaimo bars: Discover the secrets to perfecting this treat!
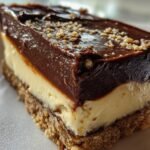
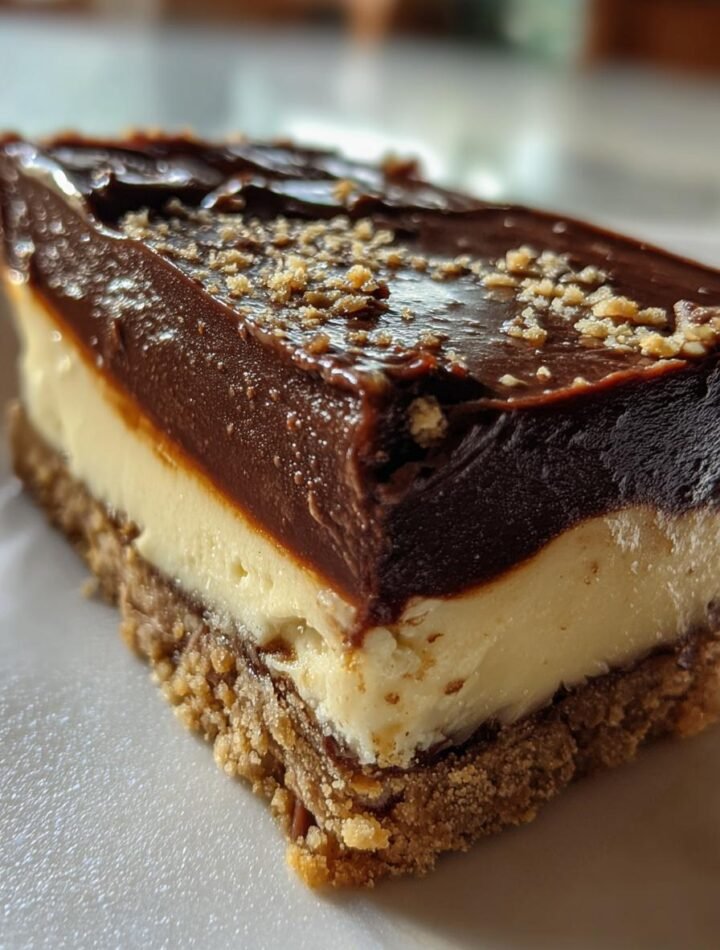
Nanaimo bars are a delicious no-bake dessert bar originating from Canada, featuring a layered structure of chocolate, custard, and a crumbly base.
- Prep Time: 20 minutes
- Cook Time: 0 minutes
- Total Time: 2 hours 20 minutes
- Yield: 16 bars 1x
- Category: Dessert
- Method: No-bake
- Cuisine: Canadian
- Diet: Vegetarian
Ingredients
- 1/2 cup unsalted butter, softened
- 1/2 cup granulated sugar
- 1/3 cup unsweetened cocoa powder
- 1 cup graham cracker crumbs
- 1/2 cup shredded coconut
- 1/2 cup custard powder
- 2 cups powdered sugar
- 1/4 cup milk
- 4 oz semi-sweet chocolate, chopped
- 2 tbsp unsalted butter
Instructions
- In a medium bowl, cream together the butter and sugar until light and fluffy.
- Add cocoa powder, graham cracker crumbs, and shredded coconut; mix until well combined.
- Press the mixture into the bottom of a greased 8-inch square pan.
- In another bowl, mix custard powder, powdered sugar, and milk until smooth; spread over the base layer.
- In a small saucepan, melt chocolate and butter together over low heat; stir until smooth.
- Pour the chocolate mixture over the custard layer and spread evenly.
- Refrigerate for at least 2 hours before cutting into squares.
Notes
- For a richer flavor, use dark chocolate instead of semi-sweet.
- Ensure the bars are fully chilled before cutting for clean edges.
- Store in an airtight container in the refrigerator for up to a week.
Nutrition
- Serving Size: 1 bar
- Calories: 200
- Sugar: 15g
- Sodium: 50mg
- Fat: 10g
- Saturated Fat: 6g
- Unsaturated Fat: 4g
- Trans Fat: 0g
- Carbohydrates: 25g
- Fiber: 1g
- Protein: 2g
- Cholesterol: 20mg