Introduction to Gluten Free Valentine Dessert
Valentine’s Day is just around the corner, and if you’re like me, you want to celebrate love with something sweet yet special. This gluten free Valentine dessert is the perfect way to indulge without the guilt. Whether you’re a busy mom juggling work and family or a professional looking to impress your partner, this recipe is a quick solution that brings joy to your table. With its rich chocolate flavor and simple ingredients, it’s sure to make your loved ones feel cherished. Let’s dive into this delightful treat that’s as easy to make as it is delicious!
Why You’ll Love This Gluten Free Valentine Dessert
This gluten free Valentine dessert is a dream come true for busy cooks like us! It’s not only quick to whip up, but it also requires minimal ingredients, making it a breeze to prepare. The rich, chocolatey goodness will satisfy your sweet tooth without any gluten worries. Plus, it’s a crowd-pleaser, perfect for impressing your loved ones. Who wouldn’t love a dessert that’s both delicious and easy to make?
Ingredients for Gluten Free Valentine Dessert
Gathering the right ingredients is the first step to creating this delightful gluten free Valentine dessert. Here’s what you’ll need:
- Almond flour: This gluten-free alternative adds a nutty flavor and moist texture.
- Cocoa powder: Unsweetened cocoa powder gives that rich chocolate taste we all crave.
- Honey or maple syrup: Both serve as natural sweeteners, with honey offering a floral note and maple syrup a hint of caramel.
- Coconut oil: Melted coconut oil keeps the dessert moist and adds a subtle tropical flavor.
- Eggs: They bind the ingredients together, providing structure and richness.
- Vanilla extract: A splash of vanilla enhances the overall flavor, making it even more delightful.
- Baking soda: This leavening agent helps the dessert rise, giving it a light texture.
- Salt: Just a pinch balances the sweetness and enhances the chocolate flavor.
- Dark chocolate chips: Make sure they’re gluten-free! These little gems add bursts of chocolatey goodness throughout.
For those looking to customize, consider adding a pinch of espresso powder for a deeper flavor or swapping in your favorite nut butter for a unique twist. You can find all the exact measurements at the bottom of the article, ready for printing!
How to Make Gluten Free Valentine Dessert
Now that we have our ingredients ready, let’s get to the fun part—making this gluten free Valentine dessert! Follow these simple steps, and you’ll have a delicious treat in no time.
Step 1: Preheat the Oven
First things first, preheat your oven to 350°F (175°C). This step is crucial because it ensures even baking. While the oven warms up, grease your baking dish with a little coconut oil or cooking spray. This will help your dessert come out easily once it’s baked.
Step 2: Mix Dry Ingredients
In a mixing bowl, combine the almond flour, cocoa powder, baking soda, and salt. Whisk them together until they’re well blended. This step is important because it helps distribute the baking soda evenly, ensuring your dessert rises beautifully. Plus, the aroma of cocoa powder will make your kitchen smell heavenly!
Step 3: Whisk Wet Ingredients
In another bowl, whisk together the honey (or maple syrup), melted coconut oil, eggs, and vanilla extract. Make sure everything is well combined. The mixture should be smooth and glossy. This is where the magic happens, as the wet ingredients will bring moisture and sweetness to our gluten free Valentine dessert.
Step 4: Combine Ingredients
Now, it’s time to bring the dry and wet ingredients together. Gradually add the dry mixture to the wet mixture, stirring gently. You want to mix until just combined—overmixing can lead to a dense texture. Think of it as a gentle hug for your batter!
Step 5: Add Chocolate Chips
Next, fold in the dark chocolate chips. Use a spatula to gently incorporate them into the batter. This folding technique helps keep the batter light and airy while ensuring those chocolatey morsels are evenly distributed. Trust me, you want every bite to be a chocolate explosion!
Step 6: Bake the Dessert
Pour the batter into your prepared baking dish and spread it evenly. Bake for 20-25 minutes. To check for doneness, insert a toothpick into the center. If it comes out clean or with a few moist crumbs, it’s ready! The smell wafting through your kitchen will be irresistible.
Step 7: Cool and Serve
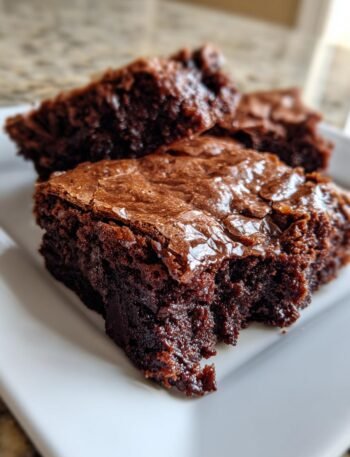
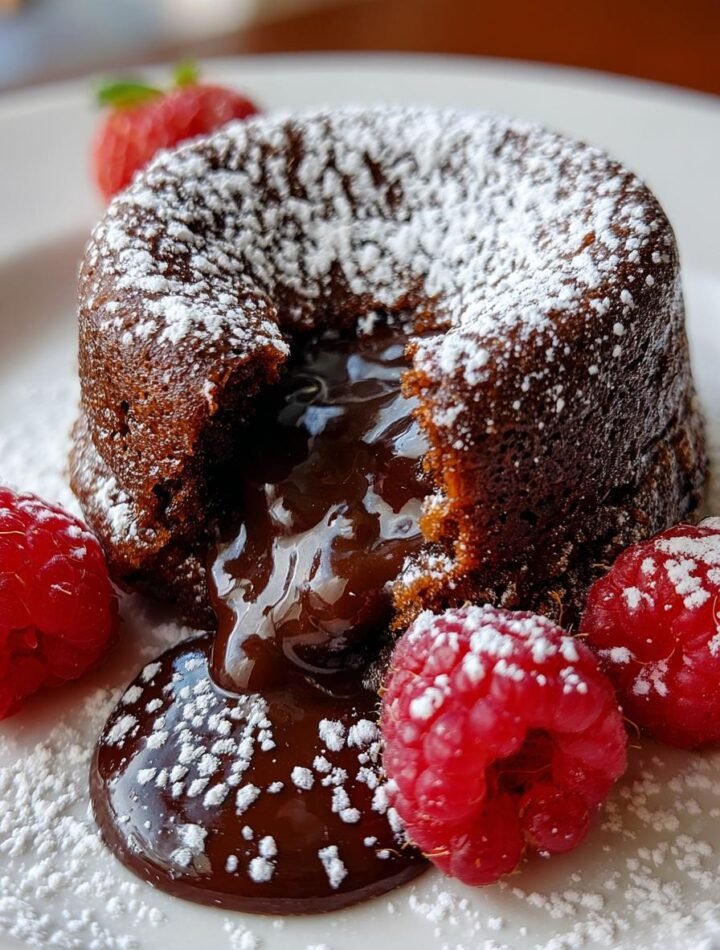
Once baked, let the dessert cool in the pan for about 10 minutes. Then, transfer it to a wire rack to cool completely. This cooling step is essential for achieving the perfect texture. Once cooled, cut into squares and serve. You can enjoy it plain or dress it up with fresh berries or whipped cream for an extra special touch!
Tips for Success
- Measure your ingredients accurately for the best results.
- Use room temperature eggs for better mixing.
- Don’t overmix the batter; it should be just combined.
- Check for doneness a few minutes early to avoid overbaking.
- Let the dessert cool completely for easier cutting.
- Store leftovers in an airtight container to keep them fresh.
Equipment Needed
- Mixing bowls: Use any size you have; just ensure they’re sturdy.
- Whisk: A fork works in a pinch for mixing wet ingredients.
- Spatula: A rubber spatula is great for folding in chocolate chips.
- Baking dish: An 8×8 inch pan is ideal, but any similar size will do.
- Toothpick: A skewer or knife can substitute for checking doneness.
Variations
- Nut Butter Swirl: Add a swirl of almond or peanut butter to the batter for a creamy twist.
- Fruit Infusion: Mix in some chopped strawberries or raspberries for a fruity burst of flavor.
- Spicy Kick: Add a pinch of cayenne pepper or cinnamon for a warm, spicy note.
- Vegan Option: Substitute eggs with flax eggs (1 tablespoon ground flaxseed mixed with 2.5 tablespoons water) for a vegan-friendly treat.
- Different Sweeteners: Experiment with agave syrup or coconut sugar for a different sweetness profile.
Serving Suggestions
- Pair with fresh berries like strawberries or raspberries for a pop of color and flavor.
- Serve with a dollop of whipped cream or coconut whipped cream for added creaminess.
- Drizzle with a bit of melted dark chocolate for an elegant touch.
- Enjoy with a cup of coffee or herbal tea for a cozy dessert experience.
FAQs about Gluten Free Valentine Dessert
Can I use a different flour instead of almond flour?
While almond flour gives this gluten free Valentine dessert its unique texture, you can try using coconut flour. Just remember, coconut flour absorbs more moisture, so you may need to adjust the liquid ingredients.
How can I make this dessert dairy-free?
To keep it dairy-free, simply use dairy-free dark chocolate chips. They’re widely available and will still provide that rich chocolate flavor we all love!
Can I make this dessert ahead of time?
Absolutely! This gluten free dessert can be made a day in advance. Just store it in an airtight container at room temperature. It’ll be just as delicious when you’re ready to serve!
What can I serve with this dessert?
For a delightful pairing, serve it with fresh berries or a scoop of dairy-free ice cream. A drizzle of chocolate sauce can elevate it even more!
How do I store leftovers?
Store any leftovers in an airtight container at room temperature for up to three days. If you want to keep them longer, consider refrigerating them for up to a week.
Final Thoughts
Creating this gluten free Valentine dessert is more than just baking; it’s about sharing love and joy with those who matter most. The rich chocolate flavor and delightful texture make it a treat that everyone can enjoy, regardless of dietary restrictions. I love how simple it is to whip up, even on the busiest days. Whether you’re celebrating with family or surprising a special someone, this dessert is sure to bring smiles and sweet moments. So, roll up your sleeves, gather your ingredients, and let the love flow through your kitchen. Happy baking!
PrintGluten Free Valentine Dessert: Indulge in Sweet Love!

A delightful gluten-free dessert perfect for celebrating love on Valentine’s Day.
- Prep Time: 15 minutes
- Cook Time: 25 minutes
- Total Time: 40 minutes
- Yield: 12 servings 1x
- Category: Dessert
- Method: Baking
- Cuisine: American
- Diet: Gluten Free
Ingredients
- 1 cup almond flour
- 1/2 cup cocoa powder
- 1/2 cup honey or maple syrup
- 1/4 cup coconut oil, melted
- 2 large eggs
- 1 tsp vanilla extract
- 1/2 tsp baking soda
- 1/4 tsp salt
- 1/2 cup dark chocolate chips (gluten-free)
Instructions
- Preheat the oven to 350°F (175°C) and grease a baking dish.
- In a mixing bowl, combine almond flour, cocoa powder, baking soda, and salt.
- In another bowl, whisk together honey (or maple syrup), melted coconut oil, eggs, and vanilla extract.
- Gradually add the dry ingredients to the wet ingredients and mix until well combined.
- Fold in the dark chocolate chips.
- Pour the batter into the prepared baking dish and spread evenly.
- Bake for 20-25 minutes or until a toothpick inserted in the center comes out clean.
- Let cool before cutting into squares and serving.
Notes
- Store leftovers in an airtight container for up to 3 days.
- For a richer flavor, add a pinch of espresso powder to the batter.
- Serve with fresh berries or whipped cream for an extra treat.
Nutrition
- Serving Size: 1 square
- Calories: 150
- Sugar: 8g
- Sodium: 50mg
- Fat: 10g
- Saturated Fat: 5g
- Unsaturated Fat: 3g
- Trans Fat: 0g
- Carbohydrates: 15g
- Fiber: 3g
- Protein: 4g
- Cholesterol: 30mg