Introduction to Chocolate Mousse
Ah, chocolate mousse! Just saying it makes my heart flutter. This rich and creamy dessert is like a warm hug after a long day. If you’re a busy mom or a professional juggling a million tasks, this chocolate mousse recipe is your secret weapon. It’s quick, easy, and perfect for impressing your loved ones or treating yourself. Imagine serving this delightful treat at your next gathering or enjoying it on a quiet evening. Trust me, once you whip up this chocolate mousse, it’ll become your go-to dessert for any occasion!
Why You’ll Love This Chocolate Mousse
This chocolate mousse is a dream come true for anyone short on time but big on flavor. It’s incredibly easy to make, requiring just a handful of ingredients. Plus, it’s a no-bake dessert, which means less mess and more time to relax. The rich, velvety texture will have your taste buds dancing, making it a perfect treat for any occasion. Trust me, you’ll be coming back for seconds!
Ingredients for Chocolate Mousse
Let’s dive into the delicious components that make this chocolate mousse a standout dessert. Each ingredient plays a vital role in creating that rich, creamy texture we all crave.
- Dark Chocolate: The star of the show! Choose high-quality chocolate with at least 70% cocoa for a deep, intense flavor. It’s the foundation of your mousse.
- Large Eggs: These help create a light and airy texture. They also add richness to the mousse. Make sure they’re fresh for the best results.
- Sugar: A little sweetness goes a long way. It balances the bitterness of the dark chocolate and enhances the overall flavor.
- Heavy Cream: This is what gives the mousse its luxurious, velvety texture. Whipping it adds volume and lightness, making each bite heavenly.
- Vanilla Extract: A splash of vanilla adds warmth and depth to the chocolate flavor. It’s like a cozy blanket for your taste buds!
For those looking to experiment, consider adding a pinch of sea salt to enhance the chocolate flavor or a splash of coffee for a mocha twist. You can find the exact measurements for these ingredients at the bottom of the article, ready for printing!
How to Make Chocolate Mousse
Now that we have our ingredients ready, let’s dive into the delightful process of making chocolate mousse. Each step is simple, yet it brings us closer to that rich, creamy goodness. Follow along, and soon you’ll be savoring your very own chocolate mousse!
Step 1: Melt the Dark Chocolate
Start by breaking the dark chocolate into small pieces. Place them in a heatproof bowl over a pot of simmering water. This method, known as a double boiler, ensures the chocolate melts gently without burning. Stir occasionally until it’s smooth and glossy. This step is crucial because burnt chocolate can ruin your mousse. Once melted, set it aside to cool slightly.
Step 2: Whisk Eggs and Sugar
In a separate bowl, crack the large eggs and add the sugar. Using a whisk or an electric mixer, beat them together until the mixture turns pale and fluffy. This should take about 3-5 minutes. You want it to be light and airy, almost like a soft cloud. This texture is key to achieving that light mousse consistency!
Step 3: Combine Chocolate and Egg Mixture
Now, it’s time to bring the melted chocolate into the mix. Gently fold the cooled chocolate into the egg mixture using a spatula. Be careful not to deflate the eggs; we want to keep that airy texture. The goal is a smooth blend where the chocolate and eggs become one delicious mixture.
Step 4: Whip the Cream
In another bowl, pour in the heavy cream and add the vanilla extract. Using a whisk or mixer, whip the cream until soft peaks form. This means when you lift the whisk, the cream should hold its shape but still be a bit wobbly. This step is vital because the whipped cream adds that luxurious texture we all love in chocolate mousse!
Step 5: Fold in the Whipped Cream
Now comes the fun part! Gently fold the whipped cream into the chocolate mixture. Use a spatula and scoop from the bottom, turning the mixture over. This technique helps keep the mousse light and fluffy. Be patient and take your time; you want everything to be well combined without losing that airy quality.
Step 6: Chill the Mousse
Finally, pour the mousse into your serving dishes. Cover them with plastic wrap and pop them in the refrigerator for at least 2 hours. This chilling time allows the mousse to set and develop its rich flavors. Trust me, the wait will be worth it when you take that first spoonful!
Tips for Success
- Use high-quality dark chocolate for the best flavor.
- Ensure your eggs are at room temperature for better mixing.
- Don’t rush the folding process; take your time to keep the mousse light.
- Chill the mousse longer if you prefer a firmer texture.
- Experiment with toppings like fresh berries or a sprinkle of sea salt for added flair.
Equipment Needed
- Heatproof Bowl: A glass or metal bowl works well. If you don’t have one, a regular bowl can suffice, but be cautious with heat.
- Whisk or Electric Mixer: A whisk is great for a workout, but an electric mixer saves time.
- Spatula: Essential for folding ingredients together. A silicone spatula is ideal.
- Refrigerator-safe Dishes: Any small bowls or ramekins will do for chilling your mousse.
Variations of Chocolate Mousse
- White Chocolate Mousse: Swap dark chocolate for white chocolate for a sweeter, creamier dessert. Just remember to adjust the sugar accordingly!
- Vegan Chocolate Mousse: Use silken tofu blended with melted dark chocolate and a bit of maple syrup for sweetness. It’s a delicious dairy-free option!
- Mint Chocolate Mousse: Add a few drops of peppermint extract to the chocolate mixture for a refreshing twist. It’s like a dessert version of a minty breeze!
- Spicy Chocolate Mousse: Incorporate a pinch of cayenne pepper or chili powder for a surprising kick. It’s a delightful contrast to the sweetness!
- Fruit-Infused Mousse: Fold in pureed fruits like raspberries or strawberries for a fruity flavor. It adds a lovely color and a burst of freshness!
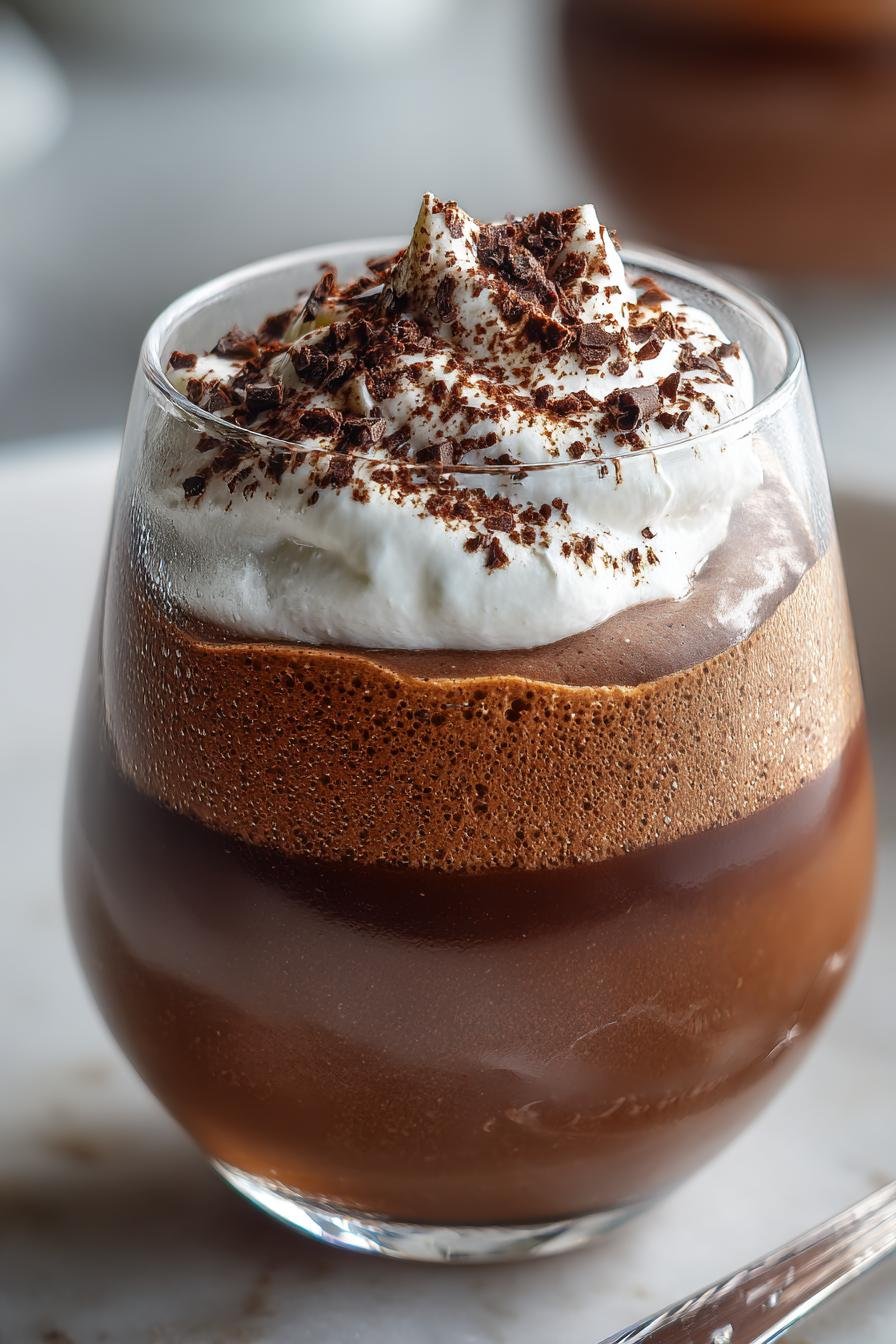
Serving Suggestions for Chocolate Mousse
- Top with a dollop of freshly whipped cream for extra indulgence.
- Garnish with chocolate shavings or fresh berries for a pop of color.
- Pair with a glass of dessert wine or coffee for a delightful contrast.
- Serve in elegant ramekins or glasses for a beautiful presentation.
FAQs about Chocolate Mousse
As I’ve shared my love for chocolate mousse, I know you might have a few questions swirling in your mind. Let’s tackle some of the most common queries to help you on your chocolate mousse journey!
Can I make chocolate mousse ahead of time?
Absolutely! Chocolate mousse is perfect for making ahead. Just prepare it, chill it, and it’ll be ready to impress your guests or satisfy your sweet tooth later. It can be stored in the fridge for up to three days.
What can I use instead of heavy cream?
If you’re looking for a lighter option, you can substitute heavy cream with coconut cream or whipped aquafaba (the liquid from canned chickpeas). Both alternatives will give you a delightful texture, though the flavor will vary slightly.
How do I know when the mousse is set?
Your chocolate mousse is set when it’s firm to the touch but still has a slight jiggle. It should hold its shape when you scoop it out. If it’s too soft, give it a bit more time in the fridge.
Can I add flavors to my chocolate mousse?
Definitely! You can infuse your mousse with flavors like orange zest, espresso, or even a splash of liqueur. Just be sure to balance the sweetness so it doesn’t overpower the chocolate.
Is chocolate mousse gluten-free?
Yes, this chocolate mousse recipe is naturally gluten-free! Just ensure that the chocolate you use is labeled gluten-free, and you’re all set to enjoy this decadent dessert without worry.
Final Thoughts
Making chocolate mousse is more than just whipping up a dessert; it’s about creating a moment of joy. Each spoonful is a reminder that life’s little pleasures are worth savoring. Whether you’re sharing it with family or enjoying it solo after a hectic day, this chocolate mousse brings a touch of elegance to any occasion. The simplicity of the recipe allows you to focus on what truly matters—delighting your taste buds and those of your loved ones. So, roll up your sleeves, embrace the process, and let this chocolate mousse become a cherished part of your culinary adventures!
PrintChocolate mousse: Discover the secret to perfection!

A rich and creamy chocolate mousse that is easy to make and perfect for any occasion.
- Prep Time: 20 minutes
- Cook Time: 0 minutes
- Total Time: 2 hours 20 minutes
- Yield: 4 servings 1x
- Category: Dessert
- Method: No-bake
- Cuisine: French
- Diet: Vegetarian
Ingredients
- 200g dark chocolate
- 3 large eggs
- 50g sugar
- 300ml heavy cream
- 1 tsp vanilla extract
Instructions
- Melt the dark chocolate in a heatproof bowl over simmering water.
- In a separate bowl, whisk the eggs and sugar until pale and fluffy.
- Fold the melted chocolate into the egg mixture.
- In another bowl, whip the heavy cream and vanilla extract until soft peaks form.
- Gently fold the whipped cream into the chocolate mixture until fully combined.
- Pour the mousse into serving dishes and refrigerate for at least 2 hours before serving.
Notes
- For a richer flavor, use high-quality dark chocolate with at least 70% cocoa.
- Make sure the chocolate is completely cooled before folding it into the egg mixture.
- Can be topped with whipped cream or chocolate shavings before serving.
Nutrition
- Serving Size: 1 serving
- Calories: 350
- Sugar: 20g
- Sodium: 50mg
- Fat: 25g
- Saturated Fat: 15g
- Unsaturated Fat: 10g
- Trans Fat: 0g
- Carbohydrates: 30g
- Fiber: 3g
- Protein: 5g
- Cholesterol: 100mg