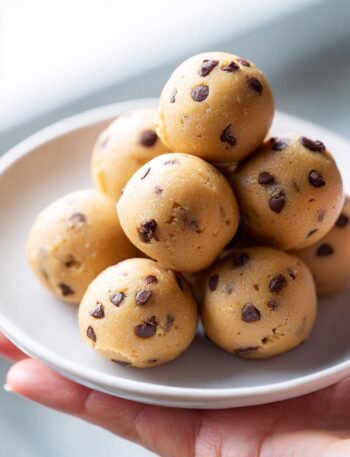
Introduction to Chocolate Truffles
Ah, chocolate truffles! Just the thought of them brings a smile to my face. These little bites of heaven are not only a treat for the taste buds but also a delightful way to show love to family and friends. As a busy mom, I know how precious time can be, and this recipe is a quick solution for those moments when you want to impress without the fuss. Whether it’s a special occasion or just a sweet craving, homemade chocolate truffles are the perfect indulgence that everyone will adore.
Why You’ll Love This Chocolate Truffles
These chocolate truffles are a dream come true for busy lives. They come together in just a few simple steps, making them a breeze to whip up. The rich, creamy texture melts in your mouth, leaving you craving more. Plus, they’re versatile! You can customize them with your favorite toppings or flavors. Trust me, once you try these homemade delights, you’ll wonder how you ever lived without them!
Ingredients for Chocolate Truffles
Let’s dive into the delicious world of chocolate truffles! Here’s what you’ll need to create these heavenly bites:
- Dark Chocolate: The star of the show! Choose high-quality chocolate for a rich flavor. You can go for semi-sweet or bittersweet, depending on your taste.
- Heavy Cream: This adds that luscious creaminess that makes the truffles melt in your mouth. Don’t skimp on this ingredient; it’s essential for the perfect texture.
- Vanilla Extract: A splash of vanilla enhances the chocolate flavor beautifully. It’s like a warm hug for your taste buds!
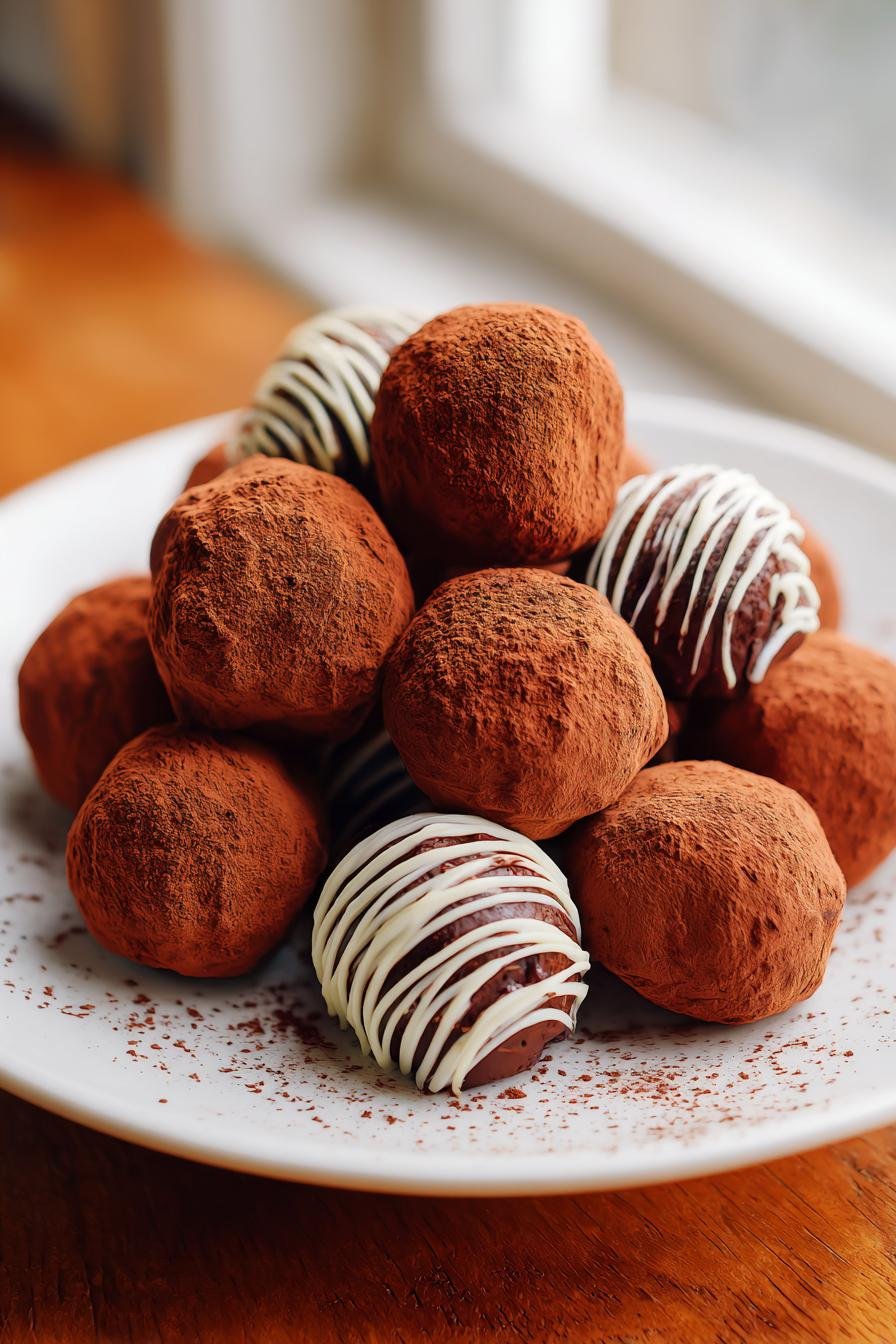
- Cocoa Powder: This is for dusting your truffles, giving them that classic look and a touch of bitterness to balance the sweetness.
- Optional Toppings: Get creative! Crushed nuts, colorful sprinkles, or coconut flakes can add a fun twist. Feel free to mix and match based on what you have at home.
For exact measurements, check the bottom of the article where you can find everything listed for easy printing. Happy cooking!
How to Make Chocolate Truffles
Now, let’s get to the fun part—making these delightful chocolate truffles! Follow these simple steps, and you’ll be on your way to creating a batch of rich, creamy goodness that will impress everyone.
Step 1: Heat the Cream
Start by pouring the heavy cream into a saucepan. Heat it over medium heat until it begins to simmer. Keep an eye on it; you don’t want it to boil over! The moment you see those little bubbles forming, it’s time to move on to the next step.
Step 2: Combine with Chocolate
Remove the saucepan from the heat and add the chopped dark chocolate. Stir gently until the chocolate melts completely and the mixture is smooth. This is where the magic happens! The rich aroma will fill your kitchen, making it hard to resist sneaking a taste.
Step 3: Add Vanilla
Once the chocolate is melted, stir in the vanilla extract. This little addition elevates the flavor, making your truffles even more irresistible. It’s like adding a secret ingredient that everyone will love!
Step 4: Chill the Mixture
Now, it’s time to let the mixture cool. Transfer it to a bowl and cover it with plastic wrap. Pop it in the refrigerator for about 2 hours, or until it’s firm enough to scoop. Patience is key here, but trust me, it’s worth the wait!
Step 5: Shape the Truffles
Once the mixture is firm, it’s time to get your hands a little messy! Use a melon baller or your hands to scoop out small portions of the chocolate mixture. Roll them into balls, about the size of a walnut. Don’t worry if they’re not perfect; each truffle has its own charm!
Step 6: Coat the Truffles
Now comes the fun part—coating your truffles! Roll each ball in cocoa powder, crushed nuts, or any toppings you fancy. This adds texture and flavor, making each bite a delightful surprise. Get creative and mix it up!
Step 7: Refrigerate Until Ready
Finally, place the coated truffles on a baking sheet lined with parchment paper. Refrigerate them until you’re ready to serve. This helps them set perfectly and keeps them fresh. When it’s time to indulge, you’ll have a beautiful platter of homemade chocolate truffles waiting for you!
Tips for Success
- Use high-quality chocolate for the best flavor. It makes a world of difference!
- Don’t rush the chilling process. Letting the mixture firm up properly ensures easy shaping.
- Keep your hands slightly damp when rolling the truffles to prevent sticking.
- Experiment with different toppings to find your favorite combinations.
- Store truffles in an airtight container to maintain freshness and flavor.
Equipment Needed
- Saucepan: A medium-sized one works best. If you don’t have one, a microwave-safe bowl can do the trick for melting chocolate.
- Mixing Bowl: Any bowl will do, but a glass bowl allows you to see the mixture as it cools.
- Melon Baller or Hands: Use a melon baller for uniform truffles, or just roll them with your hands for a personal touch.
- Parchment Paper: Line your baking sheet with this to prevent sticking. Wax paper is a good alternative.
Variations
- Flavored Truffles: Add a splash of your favorite liqueur, like orange or raspberry, for a delightful twist.
- Nutty Delight: Incorporate finely chopped nuts into the chocolate mixture for added crunch and flavor.
- Spicy Kick: Mix in a pinch of cayenne pepper or chili powder for a surprising heat that complements the chocolate.
- Vegan Option: Substitute heavy cream with coconut cream and use dairy-free chocolate for a delicious vegan treat.
- Fruit Infusion: Fold in dried fruits like cranberries or apricots for a chewy texture and fruity flavor.
Serving Suggestions
- Pair with Coffee: Serve your chocolate truffles alongside a rich cup of coffee for a delightful afternoon treat.
- Presentation: Arrange truffles on a decorative plate, dusted with cocoa powder, for an elegant touch.
- Gift Idea: Package truffles in a cute box tied with a ribbon for a thoughtful homemade gift.
- Wine Pairing: Enjoy with a glass of red wine, like Merlot, to enhance the chocolate flavors.
- Fruit Accompaniment: Serve with fresh berries for a refreshing contrast to the rich truffles.
FAQs about Chocolate Truffles
As I’ve shared my love for chocolate truffles, I know you might have some questions. Here are a few common ones that pop up, along with my answers to help you on your truffle-making journey!
Can I use milk chocolate instead of dark chocolate?
Absolutely! While dark chocolate gives a rich flavor, milk chocolate can create a sweeter, creamier truffle. Just remember, the texture might be a bit different, but it’ll still be delicious!
How long do homemade chocolate truffles last?
When stored in an airtight container in the refrigerator, your chocolate truffles can last up to a week. They’re best enjoyed fresh, but they’ll still be tasty for a few days!
Can I freeze chocolate truffles?
Yes, you can freeze them! Just make sure to place them in a single layer on a baking sheet first, then transfer them to an airtight container. They can last up to three months in the freezer. Just thaw them in the fridge before serving.
What’s the best way to coat chocolate truffles?
Coating your truffles can be as simple or as fancy as you like! Cocoa powder is classic, but crushed nuts, sprinkles, or even melted chocolate can add a fun twist. Just roll them gently to ensure an even coat.
Can I make chocolate truffles without heavy cream?
Yes! If you’re looking for a lighter option, you can substitute heavy cream with coconut cream or even a nut milk. Just keep in mind that the texture and flavor will change slightly, but they’ll still be delightful!
Final Thoughts
Making chocolate truffles is more than just a recipe; it’s an experience filled with joy and creativity. Each step invites you to indulge in the rich, creamy world of chocolate, transforming simple ingredients into delightful bites. Whether you’re treating yourself or sharing with loved ones, these truffles bring smiles and sweet moments. I love how they can be customized to fit any occasion, making them a versatile treat. So, roll up your sleeves, embrace the mess, and enjoy the delicious journey of creating your own homemade chocolate truffles. You won’t regret it!
PrintChocolate truffles: Discover the secret to sublime bites!

Indulge in the rich and creamy delight of homemade chocolate truffles, perfect for any occasion.
- Prep Time: 20 minutes
- Cook Time: 5 minutes
- Total Time: 2 hours 25 minutes
- Yield: 24 truffles 1x
- Category: Dessert
- Method: No-bake
- Cuisine: French
- Diet: Vegetarian
Ingredients
- 8 oz dark chocolate, chopped
- 1/2 cup heavy cream
- 1 tsp vanilla extract
- Cocoa powder for dusting
- Optional toppings: crushed nuts, sprinkles, or coconut flakes
Instructions
- In a saucepan, heat the heavy cream over medium heat until it begins to simmer.
- Remove from heat and add the chopped dark chocolate, stirring until smooth.
- Stir in the vanilla extract.
- Refrigerate the mixture for about 2 hours, or until firm.
- Once firm, use a melon baller or your hands to scoop out small portions and roll them into balls.
- Roll the truffles in cocoa powder or your choice of toppings.
- Place the truffles on a baking sheet lined with parchment paper and refrigerate until ready to serve.
Notes
- For a different flavor, try adding a splash of liqueur to the chocolate mixture.
- Store truffles in an airtight container in the refrigerator for up to a week.
Nutrition
- Serving Size: 1 truffle
- Calories: 100
- Sugar: 8g
- Sodium: 5mg
- Fat: 7g
- Saturated Fat: 4g
- Unsaturated Fat: 3g
- Trans Fat: 0g
- Carbohydrates: 10g
- Fiber: 1g
- Protein: 1g
- Cholesterol: 10mg