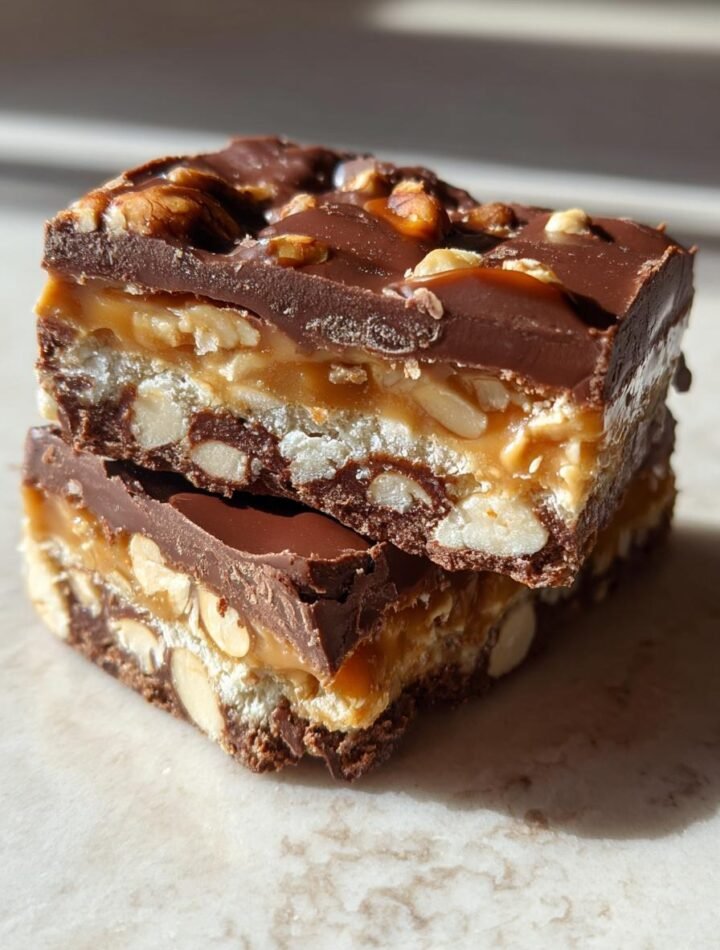
Introduction to Gluten Free Snickers Bars
Hey there, fellow food lovers! If you’re anything like me, you know that life can get pretty hectic. Between juggling work, family, and everything in between, finding time to whip up a delicious treat can feel impossible. That’s where these homemade gluten free Snickers bars come in! They’re not just a quick solution for a busy day; they’re a delightful way to satisfy your sweet tooth without the guilt. Trust me, once you try these, you’ll want to share them with everyone you love. Let’s dive into this sweet adventure together!
Why You’ll Love This Gluten Free Snickers Bars
These gluten free Snickers bars are a game changer! They’re incredibly easy to make, taking just a few simple steps. Plus, they’re no-bake, which means less time in the kitchen and more time enjoying life. The rich, chocolatey flavor combined with the chewy dates and crunchy peanuts creates a taste sensation that will have your taste buds dancing. Perfect for busy moms and professionals, these bars are a sweet treat you can feel good about indulging in!
Ingredients for Gluten Free Snickers Bars
Let’s gather our ingredients for these delightful gluten free Snickers bars! Each one plays a crucial role in creating that perfect balance of flavors and textures. Here’s what you’ll need:
- Dates: These little gems are the base of our bars, providing natural sweetness and a chewy texture. Make sure they’re pitted for easy blending!
- Natural Peanut Butter: This creamy goodness adds richness and a nutty flavor. You can swap it for almond butter if you prefer a different taste.
- Honey or Maple Syrup: Both options serve as sweeteners, enhancing the overall flavor. Choose honey for a classic touch or maple syrup for a unique twist.
- Gluten-Free Crispy Rice Cereal: This adds that satisfying crunch we all love. Look for brands that are certified gluten-free to ensure safety.
- Dark Chocolate Chips: The star of the show! They melt beautifully and create a luscious topping. Opt for dairy-free chips if you’re avoiding dairy.
- Coconut Oil: This helps the chocolate melt smoothly and adds a hint of tropical flavor. It’s also great for a glossy finish!
- Chopped Peanuts: These provide an extra crunch and enhance the peanut flavor. Feel free to use other nuts if you’re feeling adventurous!
For exact measurements, check the bottom of the article where you can find everything listed for easy printing. Now, let’s get ready to create some magic in the kitchen!
How to Make Gluten Free Snickers Bars
Now that we have our ingredients ready, let’s dive into the fun part—making these delicious gluten free Snickers bars! Follow these simple steps, and you’ll have a sweet treat that’s sure to impress.
Step 1: Prepare the Date Mixture
Start by placing the pitted dates in your food processor. Blend them until they form a sticky paste. This might take a minute or two, so be patient! The dates should be smooth and gooey, almost like a caramel. If your processor struggles, add a splash of water to help it along.
Step 2: Combine Ingredients
Next, add the creamy peanut butter and your choice of honey or maple syrup to the date paste. Blend everything together until it’s well combined. The mixture should be thick and sticky, with a lovely nutty aroma wafting through your kitchen. This is where the magic begins!
Step 3: Add Crunch
In a large bowl, mix the date mixture with the gluten-free crispy rice cereal and chopped peanuts. Stir gently until everything is evenly coated. This step is crucial for that delightful crunch in every bite. You can even sneak a taste at this point—just to make sure it’s as delicious as it looks!
Step 4: Form the Base
Now it’s time to form the base of our bars. Line a baking dish with parchment paper for easy removal later. Press the mixture firmly into the dish, creating an even layer. Use your hands or a spatula to smooth it out. The firmer you press, the better your bars will hold together!
Step 5: Melt the Chocolate
In a microwave-safe bowl, combine the dark chocolate chips and coconut oil. Heat in short bursts, stirring in between, until melted and smooth. This chocolatey goodness will be the crowning glory of your bars. Make sure it’s not too hot when you pour it on, or it might melt the base!
Step 6: Assemble the Bars
Pour the melted chocolate over the pressed mixture in the baking dish. Use a spatula to spread it evenly across the top. This is where the bars get their rich, decadent finish. Don’t be shy—make sure every corner is covered in that luscious chocolate!
Step 7: Chill and Cut
Finally, pop the baking dish into the refrigerator for at least two hours. This will allow the bars to set properly. Once they’re firm, remove them from the dish and cut them into bars. You’ll be left with a beautiful batch of gluten free Snickers bars, ready to be devoured!
Tips for Success
- Make sure your dates are fresh and soft for easy blending.
- Use a sturdy spatula to press the mixture firmly into the baking dish.
- For a smoother chocolate layer, let the melted chocolate cool slightly before pouring.
- Experiment with different nut butters for unique flavors.
- Store leftover bars in an airtight container to keep them fresh.
Equipment Needed
- Food Processor: Essential for blending dates. A high-powered blender works too.
- Baking Dish: A 9×9 inch dish is perfect. Any similar-sized dish will do.
- Parchment Paper: For easy removal. You can use plastic wrap in a pinch.
- Microwave-Safe Bowl: Needed for melting chocolate. A double boiler is a great alternative.
- Spatula: For spreading and pressing. A wooden spoon can work as well.
Variations
- Nut-Free Version: Substitute sunflower seed butter for peanut butter to make these bars nut-free.
- Vegan Option: Use maple syrup instead of honey and ensure your chocolate chips are dairy-free for a completely vegan treat.
- Flavor Boost: Add a teaspoon of vanilla extract or a pinch of sea salt to enhance the flavor profile.
- Fruit Add-Ins: Mix in dried fruits like cranberries or raisins for a chewy twist.
- Protein-Packed: Stir in a scoop of your favorite protein powder for an extra nutritional boost.
Serving Suggestions
- Pair these gluten free Snickers bars with a glass of almond milk for a delightful treat.
- Serve them alongside fresh fruit for a balanced snack.
- For a fun presentation, cut the bars into bite-sized pieces and arrange them on a colorful platter.
- Drizzle some extra melted chocolate on top for an indulgent touch.
FAQs about Gluten Free Snickers Bars
Can I make these gluten free Snickers bars nut-free?
Absolutely! Just swap out the peanut butter for sunflower seed butter. This way, you can enjoy the same deliciousness without the nuts!
How long do these bars last?
When stored in an airtight container in the refrigerator, these gluten free Snickers bars can last up to a week. They might even taste better as they sit!
Can I freeze these bars?
Yes, you can! Just wrap them individually in plastic wrap and place them in a freezer-safe container. They’ll keep for about a month, making them a perfect make-ahead treat!
What can I use instead of dark chocolate chips?
If you’re not a fan of dark chocolate, feel free to use milk chocolate or even white chocolate chips. Just make sure they’re gluten-free!
Are these bars suitable for a vegan diet?
Yes! Simply use maple syrup instead of honey and ensure your chocolate chips are dairy-free. You’ll have a delicious vegan treat that everyone can enjoy!
Final Thoughts
Making these gluten free Snickers bars is more than just a cooking project; it’s a delightful experience that brings joy to both the maker and the eater. The sweet aroma of melting chocolate and the satisfying crunch of peanuts create a symphony of flavors that dance on your palate. Whether you’re treating yourself after a long day or sharing them with loved ones, these bars are sure to bring smiles all around. Plus, knowing they’re homemade and gluten-free adds an extra layer of satisfaction. So, roll up your sleeves and enjoy the sweet adventure of creating these delicious treats!
PrintGluten free Snickers bars you can easily make at home!

Delicious homemade gluten-free Snickers bars that are easy to make and perfect for satisfying your sweet tooth.
- Prep Time: 15 minutes
- Cook Time: 10 minutes
- Total Time: 2 hours 25 minutes
- Yield: 12 bars 1x
- Category: Dessert
- Method: No-bake
- Cuisine: American
- Diet: Gluten Free
Ingredients
- 1 cup dates, pitted
- 1/2 cup natural peanut butter
- 1/4 cup honey or maple syrup
- 1 cup gluten-free crispy rice cereal
- 1 cup dark chocolate chips
- 1 tablespoon coconut oil
- 1/2 cup chopped peanuts
Instructions
- In a food processor, blend the pitted dates until they form a sticky paste.
- Add the peanut butter and honey (or maple syrup) to the dates and blend until well combined.
- In a large bowl, mix the date mixture with the gluten-free crispy rice cereal and chopped peanuts until evenly coated.
- Press the mixture into a lined baking dish to form an even layer.
- Melt the dark chocolate chips and coconut oil together in a microwave or double boiler.
- Pour the melted chocolate over the pressed mixture and spread evenly.
- Refrigerate for at least 2 hours until set, then cut into bars.
Notes
- Store the bars in an airtight container in the refrigerator.
- Feel free to substitute almond butter for peanut butter if desired.
- For a sweeter taste, add more honey or maple syrup to the mixture.
Nutrition
- Serving Size: 1 bar
- Calories: 180
- Sugar: 10g
- Sodium: 50mg
- Fat: 9g
- Saturated Fat: 3g
- Unsaturated Fat: 6g
- Trans Fat: 0g
- Carbohydrates: 22g
- Fiber: 3g
- Protein: 4g
- Cholesterol: 0mg