Introduction to Raspberry Tart
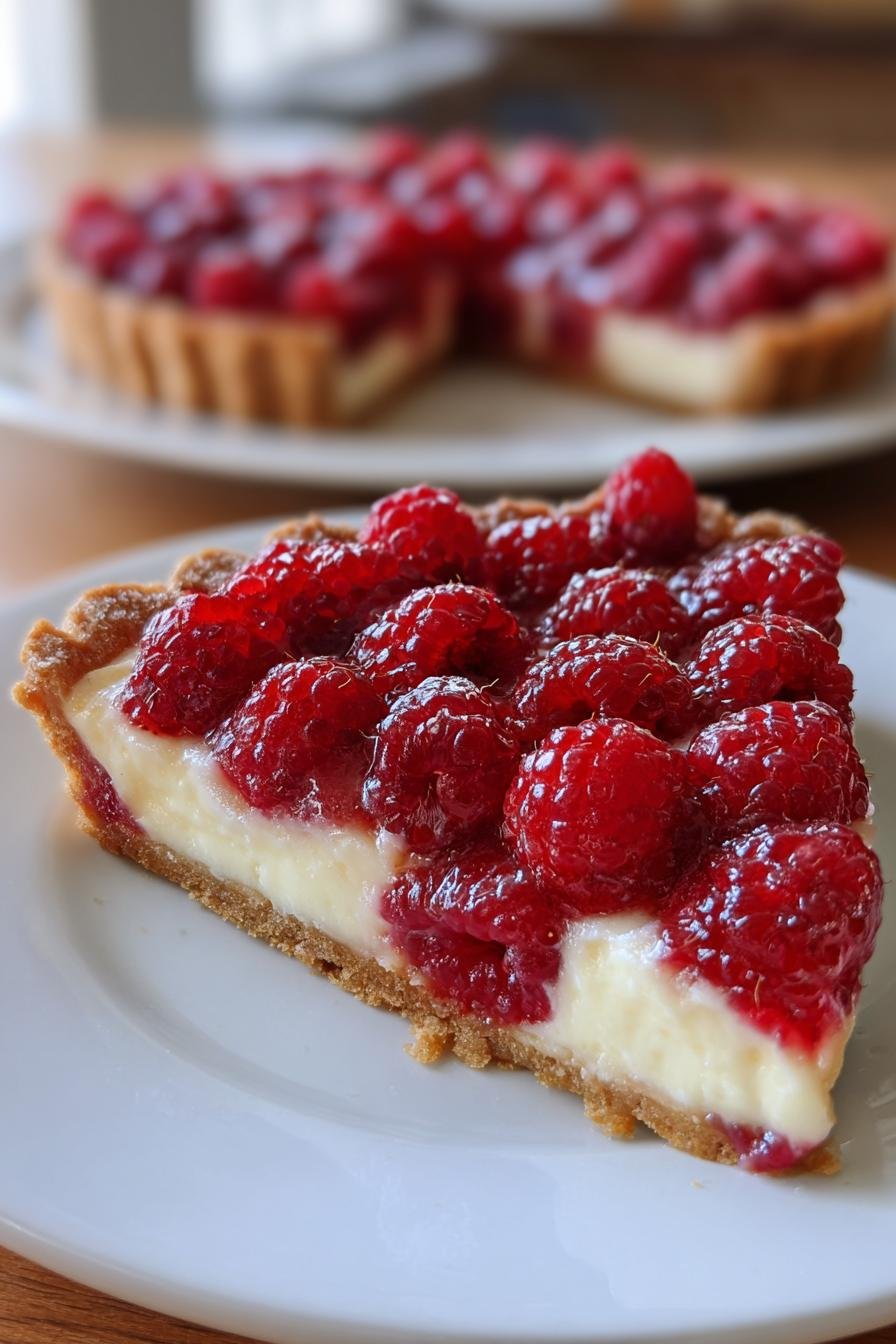
Ah, the raspberry tart! It’s like a little slice of heaven that brings joy to any table. I remember the first time I made this delightful dessert; my family couldn’t believe I had whipped up something so elegant. This raspberry tart is not just a treat; it’s a quick solution for those busy days when you want to impress your loved ones without spending hours in the kitchen. With its buttery crust and luscious filling, it’s sure to become a favorite in your home, just like it has in mine!
Why You’ll Love This Raspberry Tart
This raspberry tart is a delightful blend of simplicity and elegance. It comes together quickly, making it perfect for busy moms like us who juggle a million things. The taste? Oh, it’s a burst of fresh raspberry goodness that dances on your palate. Plus, it’s versatile enough for any occasion, whether it’s a family gathering or a cozy night in. Trust me, once you try it, you’ll be hooked!
Ingredients for Raspberry Tart
Let’s gather our ingredients for this delightful raspberry tart! Each component plays a vital role in creating that perfect balance of flavors and textures. Here’s what you’ll need:
- All-purpose flour: This is the backbone of our buttery crust, providing structure and a tender bite.
- Unsalted butter: Softened butter adds richness and flavor to the crust. Make sure it’s at room temperature for easy mixing.
- Powdered sugar: This sweetener gives the crust a delicate sweetness and a smooth texture.
- Salt: Just a pinch enhances the flavors and balances the sweetness.
- Large egg yolk: This adds richness to the crust and helps bind everything together.
- Heavy cream: The star of our filling! It creates a luscious, creamy texture that complements the tartness of the raspberries.
- Granulated sugar: Sweetens the filling and balances the tartness of the fresh raspberries.
- Large eggs: These help set the filling, giving it a custard-like consistency.
- Vanilla extract: A splash of this adds warmth and depth to the filling.
- Fresh raspberries: The highlight of our tart! Their vibrant color and tangy flavor make this dessert truly special.
For those looking to switch things up, consider using almond flour for a gluten-free crust or other berries like blueberries or strawberries for a different twist. You can find all the exact measurements at the bottom of the article, ready for printing!
How to Make Raspberry Tart
Now that we have our ingredients ready, let’s dive into the delightful process of making this raspberry tart! Follow these simple steps, and you’ll be on your way to impressing your family and friends.
Step 1: Preheat the Oven
First things first, preheat your oven to 350°F (175°C). Preheating is crucial because it ensures even baking. If you skip this step, your tart might not set properly, leaving you with a soggy mess instead of a beautiful dessert. Trust me, a well-preheated oven is your best friend in baking!
Step 2: Prepare the Tart Crust
In a mixing bowl, combine the all-purpose flour, softened butter, powdered sugar, and salt. Use your fingers or a pastry cutter to mix until the mixture resembles coarse crumbs. You want a crumbly texture, not a dough yet. Then, add the egg yolk and mix until a dough forms. If it feels too dry, don’t hesitate to add a teaspoon of cold water. This crust is the foundation of your raspberry tart, so take your time to get it just right!
Step 3: Bake the Crust
Once your dough is ready, press it into a tart pan evenly. Make sure to cover the bottom and sides well. Bake the crust for about 15 minutes, or until it’s lightly golden. Keep an eye on it! If it puffs up, gently press it down with a fork. A perfectly baked crust is key to a successful raspberry tart!
Step 4: Make the Filling
While the crust is baking, let’s whip up the filling. In a separate bowl, whisk together the heavy cream, granulated sugar, eggs, and vanilla extract. Mix until smooth and creamy. You want a nice, homogenous mixture that will create a luscious filling. If you see any lumps, keep whisking until it’s silky!
Step 5: Assemble the Tart
Once the crust is out of the oven and cooled slightly, pour the creamy filling into the crust. Now, here comes the fun part! Arrange the fresh raspberries on top of the filling. You can be artistic with this—create a beautiful pattern or just scatter them randomly. Either way, they’ll look stunning!
Step 6: Bake the Tart
Now it’s time to bake the assembled tart! Place it back in the oven and bake for an additional 25-30 minutes. You’ll know it’s done when the filling is set and slightly puffed. A gentle jiggle in the center is okay, but it shouldn’t be liquidy. If the edges start to brown too much, cover them with foil.
Step 7: Cool and Serve
Once baked, remove the tart from the oven and let it cool completely in the pan. This cooling time allows the filling to set perfectly. When you’re ready to serve, slice it up and enjoy! For an extra touch, consider serving it with a dollop of whipped cream or a sprinkle of powdered sugar. Your raspberry tart is now ready to dazzle!
Tips for Success
- Use room temperature ingredients for a smoother filling.
- Don’t overmix the crust; it should be crumbly, not a dough.
- Check the tart frequently while baking to avoid over-browning.
- Let the tart cool completely for the best texture.
- Experiment with different berries for a unique twist!
Equipment Needed
- Tart pan: A standard 9-inch tart pan works best, but a pie dish can be a great alternative.
- Mixing bowls: Use medium-sized bowls for mixing ingredients; a large bowl is handy for the filling.
- Whisk: A simple whisk is perfect for blending the filling; a fork can work in a pinch.
- Pastry cutter or fork: Great for mixing the crust ingredients, but your hands will do just fine!
- Oven mitts: Essential for safely handling hot pans.
Variations of Raspberry Tart
- Chocolate Raspberry Tart: Add melted dark chocolate to the filling for a rich, decadent twist.
- Nut Crust: Substitute part of the all-purpose flour with ground almonds or hazelnuts for a nutty flavor.
- Vegan Option: Use coconut cream instead of heavy cream and flax eggs as a substitute for regular eggs.
- Herb-Infused: Add a hint of fresh mint or basil to the filling for a refreshing herbal note.
- Mixed Berries: Combine raspberries with blueberries or strawberries for a colorful and flavorful medley.
Serving Suggestions for Raspberry Tart
- Pair with a scoop of vanilla ice cream for a delightful contrast.
- Serve alongside a fresh fruit salad for a light, refreshing touch.
- Drizzle with a balsamic reduction for an elegant presentation.
- Accompany with a cup of herbal tea for a cozy afternoon treat.
- Garnish with mint leaves for a pop of color and freshness.
FAQs about Raspberry Tart
As I’ve shared my love for this raspberry tart, I know you might have a few questions. Here are some common queries that pop up when making this delightful dessert:
Can I use frozen raspberries instead of fresh?
Absolutely! Frozen raspberries work well, but make sure to thaw and drain them first. This prevents excess moisture from making your tart soggy.
How do I store leftover raspberry tart?
Store any leftovers in the refrigerator, covered, for up to three days. Just be sure to let it cool completely before wrapping it up!
Can I make the tart crust ahead of time?
Yes! You can prepare the crust a day in advance. Just wrap it tightly in plastic wrap and keep it in the fridge until you’re ready to bake.
What can I substitute for heavy cream?
If you’re looking for a lighter option, you can use half-and-half or a non-dairy alternative like coconut cream. Just keep in mind that the texture may vary slightly.
Is this raspberry tart suitable for special diets?
This raspberry tart can be adapted for various diets! You can make it gluten-free by using almond flour and a vegan version by substituting eggs and cream. The possibilities are endless!
Final Thoughts
Making this raspberry tart is more than just baking; it’s about creating memories in the kitchen. The joy of watching my family’s faces light up as they take their first bite is priceless. This dessert brings a touch of elegance to any occasion, yet it’s simple enough for a weeknight treat. Whether you’re celebrating a special moment or just indulging in a sweet escape, this raspberry tart is sure to delight. So roll up your sleeves, embrace the process, and let the sweet aroma fill your home. You’ll be glad you did!
PrintRaspberry Tart: Discover the Secret to Perfecting It!

A delicious and elegant raspberry tart that combines a buttery crust with a rich filling and fresh raspberries.
- Prep Time: 20 minutes
- Cook Time: 45 minutes
- Total Time: 1 hour 5 minutes
- Yield: 8 servings 1x
- Category: Dessert
- Method: Baking
- Cuisine: French
- Diet: Vegetarian
Ingredients
- 1 1/4 cups all-purpose flour
- 1/2 cup unsalted butter, softened
- 1/4 cup powdered sugar
- 1/4 teaspoon salt
- 1 large egg yolk
- 1/2 cup heavy cream
- 1/2 cup granulated sugar
- 2 large eggs
- 1 teaspoon vanilla extract
- 2 cups fresh raspberries
Instructions
- Preheat the oven to 350°F (175°C).
- In a bowl, mix flour, butter, powdered sugar, and salt until crumbly.
- Add the egg yolk and mix until a dough forms.
- Press the dough into a tart pan and bake for 15 minutes.
- In another bowl, whisk together heavy cream, granulated sugar, eggs, and vanilla.
- Pour the mixture into the baked crust.
- Arrange the raspberries on top of the filling.
- Bake for an additional 25-30 minutes until set.
- Let cool before serving.
Notes
- For a sweeter tart, add more sugar to the filling.
- Serve with whipped cream for added richness.
- Store leftovers in the refrigerator for up to 3 days.
Nutrition
- Serving Size: 1 slice
- Calories: 250
- Sugar: 15g
- Sodium: 150mg
- Fat: 15g
- Saturated Fat: 9g
- Unsaturated Fat: 4g
- Trans Fat: 0g
- Carbohydrates: 30g
- Fiber: 2g
- Protein: 3g
- Cholesterol: 70mg