Introduction to Beef Tenderloin
Ah, beef tenderloin! Just the thought of it makes my mouth water. This cut of meat is not only tender but also incredibly flavorful, making it a perfect choice for any occasion. Whether you’re looking to impress guests at a dinner party or simply want to treat your family to a special meal, this recipe is your go-to solution. I know how busy life can get, but with just a few simple steps, you can create a dish that feels gourmet without spending hours in the kitchen. Let’s unlock the secrets to cooking beef tenderloin together!
Why You’ll Love This Beef Tenderloin
This beef tenderloin recipe is a game-changer for busy moms and professionals alike. It’s quick, taking just 45 minutes from start to finish, yet it delivers a restaurant-quality meal right at home. The rich flavors and melt-in-your-mouth texture will have your family raving. Plus, it’s versatile enough to pair with any side dish, making it a perfect fit for any occasion. You’ll feel like a culinary superstar!
Ingredients for Beef Tenderloin
Gathering the right ingredients is the first step to cooking beef tenderloin that will wow your family and friends. Here’s what you’ll need:
- Beef Tenderloin: The star of the show! This cut is known for its tenderness and rich flavor. Look for a well-marbled piece for the best results.
- Olive Oil: A drizzle of this liquid gold helps to lock in moisture and adds a lovely richness to the meat.
- Salt: Essential for enhancing the natural flavors of the beef. It’s the simplest way to elevate your dish.
- Black Pepper: Freshly cracked pepper adds a hint of spice and depth. It’s a must for seasoning any meat.
- Garlic: Minced garlic brings a wonderful aroma and flavor that complements the beef beautifully.
- Fresh Herbs: Herbs like rosemary or thyme add a fragrant touch. They can be used as a garnish or mixed into the seasoning for extra flavor.
Feel free to get creative! You can substitute olive oil with avocado oil for a different flavor profile. If you’re a fan of spice, consider adding a pinch of cayenne pepper or smoked paprika to the seasoning mix. For exact measurements, check the bottom of the article where you can find everything available for printing.
How to Make Beef Tenderloin
Now that we have our ingredients ready, let’s dive into the steps for cooking beef tenderloin. Each step is crucial for achieving that perfect flavor and texture. Follow along, and I promise you’ll impress everyone at the dinner table!
Step 1: Preheat the Oven
First things first, preheat your oven to 400°F (200°C). This step is essential because it ensures that the beef tenderloin cooks evenly. A hot oven helps to create a beautiful crust on the outside while keeping the inside juicy and tender. Trust me, you don’t want to skip this part!
Step 2: Trim the Tenderloin
Next, let’s trim the tenderloin. Use a sharp knife to remove any excess fat or silver skin. This is important because it helps the meat cook more evenly and prevents it from becoming greasy. Plus, it allows the seasoning to penetrate better. A little care here goes a long way!
Step 3: Season the Beef
Now it’s time to season the beef. Rub the tenderloin with olive oil, making sure to coat it evenly. Then sprinkle salt, black pepper, and minced garlic all over. Don’t be shy! This seasoning mix is what brings out the natural flavors of the beef. Massage it in gently for maximum flavor.
Step 4: Sear the Tenderloin
Heat a skillet over medium-high heat and add a splash of olive oil. Once hot, carefully place the tenderloin in the skillet. Sear it on all sides until it’s beautifully browned. This step is crucial because it locks in the juices and creates a delicious crust. Aim for about 2-3 minutes per side. Your kitchen will smell heavenly!
Step 5: Roast in the Oven
Transfer the skillet to your preheated oven. Roast the beef tenderloin for 20-30 minutes, depending on its size. To check for doneness, use a meat thermometer. You’re looking for an internal temperature of 135°F (57°C) for medium-rare. Remember, the meat will continue to cook a bit while resting, so don’t overdo it!
Step 6: Rest the Meat
Once it’s done, remove the tenderloin from the oven and let it rest for 10-15 minutes. This step is vital for juiciness. Resting allows the juices to redistribute throughout the meat, ensuring every slice is tender and flavorful. Patience is key here, but I promise it’s worth the wait!
Step 7: Garnish and Serve
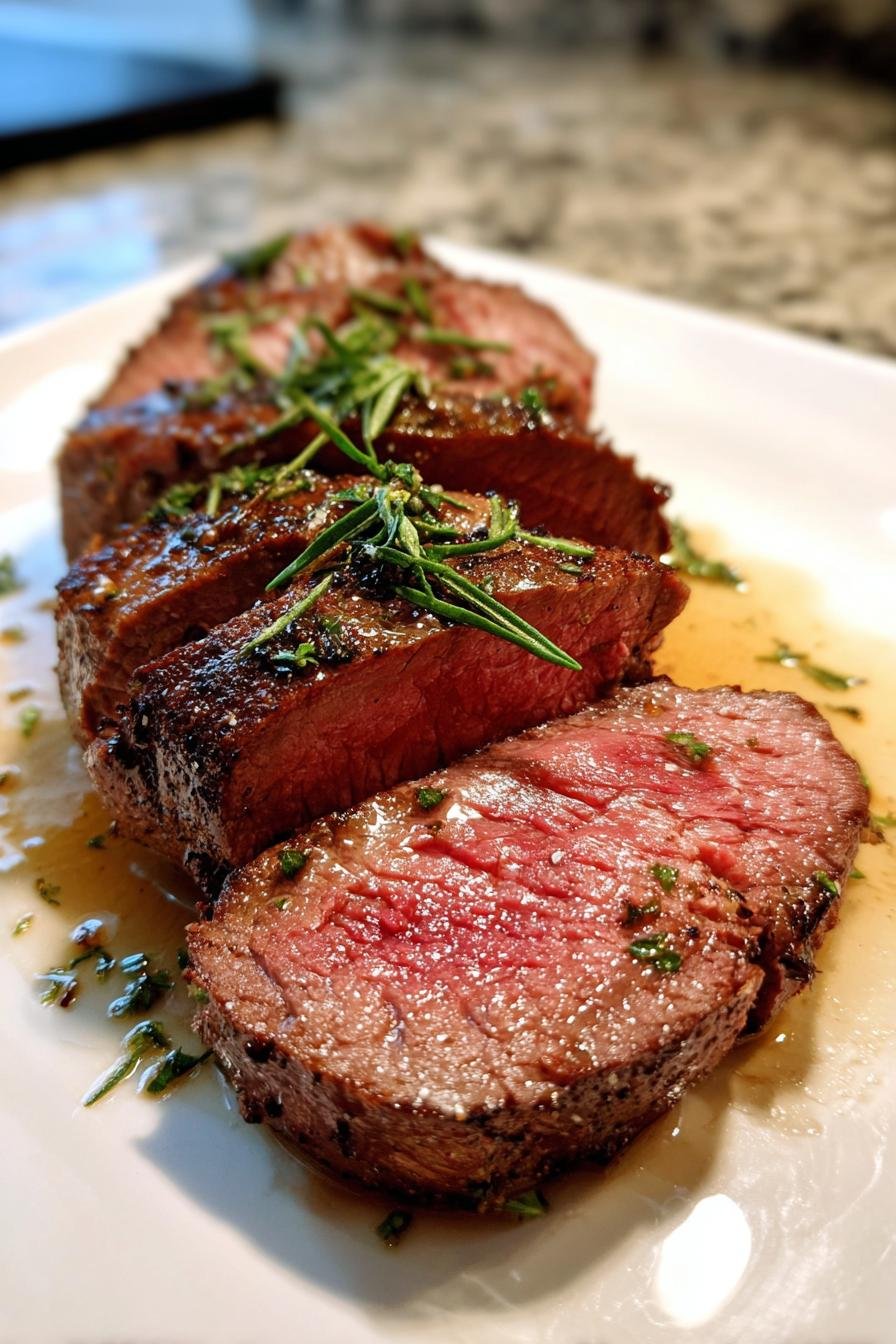
Finally, it’s time to garnish and serve your masterpiece! Slice the beef tenderloin into thick pieces and arrange them on a platter. Sprinkle fresh herbs like rosemary or thyme on top for a pop of color and flavor. Serve it with your favorite sides, and watch your family’s eyes light up!
Tips for Success
- Always use a meat thermometer for precise cooking. It takes the guesswork out!
- Let the beef tenderloin rest after cooking. This ensures juicy, flavorful slices.
- Experiment with different herbs and spices to customize the flavor to your liking.
- For a more intense flavor, marinate the tenderloin for a few hours before cooking.
- Pair with a rich sauce or gravy for an extra touch of indulgence.
Equipment Needed
- Skillet: A cast-iron skillet works wonders, but any oven-safe skillet will do.
- Meat Thermometer: Essential for checking doneness. A simple instant-read thermometer is perfect.
- Sharp Knife: A good chef’s knife is key for trimming and slicing.
- Cutting Board: Use a sturdy board to protect your countertops while slicing.
Variations of Beef Tenderloin
- Herb-Crusted Tenderloin: Add a mixture of chopped fresh herbs like parsley, basil, and oregano to the seasoning for a vibrant flavor boost.
- Spicy Rub: Incorporate cayenne pepper or chili powder into the seasoning mix for a kick of heat that will tantalize your taste buds.
- Garlic Butter Baste: During the last few minutes of roasting, baste the tenderloin with melted garlic butter for an extra layer of richness.
- Asian-Inspired Marinade: Marinate the beef in soy sauce, ginger, and sesame oil for a delicious twist that pairs beautifully with stir-fried vegetables.
- Stuffed Tenderloin: Create a pocket in the tenderloin and stuff it with a mixture of spinach, feta cheese, and sun-dried tomatoes for a gourmet touch.
Serving Suggestions for Beef Tenderloin
- Classic Sides: Pair with creamy mashed potatoes or roasted vegetables for a comforting meal.
- Fresh Salad: A crisp arugula salad with lemon vinaigrette adds a refreshing contrast.
- Wine Pairing: Serve with a bold red wine, like Cabernet Sauvignon, to enhance the flavors.
- Presentation: Arrange slices on a wooden board, garnished with herbs for a rustic touch.
FAQs about Beef Tenderloin
What is the best way to cook beef tenderloin?
The best way to cook beef tenderloin is by searing it first and then roasting it in the oven. This method locks in the juices and creates a beautiful crust. Always use a meat thermometer to ensure it reaches your desired doneness.
How long should I let beef tenderloin rest?
Letting beef tenderloin rest for 10-15 minutes after cooking is crucial. This allows the juices to redistribute, resulting in tender and juicy slices. Patience pays off here!
Can I marinate beef tenderloin?
Absolutely! Marinating beef tenderloin can enhance its flavor. A simple marinade of olive oil, garlic, and herbs works wonders. Just remember to marinate for at least an hour, or overnight for deeper flavor.
What sides pair well with beef tenderloin?
Beef tenderloin pairs beautifully with sides like creamy mashed potatoes, roasted vegetables, or a fresh salad. A bold red wine, like Cabernet Sauvignon, complements the rich flavors perfectly.
How do I know when beef tenderloin is done?
The best way to check for doneness is by using a meat thermometer. For medium-rare, aim for an internal temperature of 135°F (57°C). Remember, the meat will continue to cook slightly while resting!
Final Thoughts
Cooking beef tenderloin is more than just preparing a meal; it’s about creating memories around the dinner table. The joy of serving a perfectly cooked tenderloin, with its rich flavors and tender texture, brings smiles and satisfaction to everyone. I love how this recipe transforms a busy weeknight into a special occasion, making it feel like a celebration. Whether it’s a family gathering or a cozy dinner for two, this dish is sure to impress. So roll up your sleeves, embrace the process, and enjoy the delicious rewards of your culinary adventure!
Print“Beef Tenderloin: Unlock the Secrets to Perfect Cooking!”

A comprehensive guide to cooking beef tenderloin perfectly, including tips and techniques for achieving the best flavor and texture.
- Prep Time: 15 minutes
- Cook Time: 30 minutes
- Total Time: 45 minutes
- Yield: Serves 6-8 1x
- Category: Main Course
- Method: Roasting
- Cuisine: American
- Diet: Gluten Free
Ingredients
- 1 beef tenderloin (about 2–3 pounds)
- 2 tablespoons olive oil
- 2 teaspoons salt
- 1 teaspoon black pepper
- 2 cloves garlic, minced
- Fresh herbs (such as rosemary or thyme)
Instructions
- Preheat your oven to 400°F (200°C).
- Trim any excess fat from the beef tenderloin.
- Rub the tenderloin with olive oil, salt, pepper, and minced garlic.
- Heat a skillet over medium-high heat and sear the tenderloin on all sides until browned.
- Transfer the skillet to the preheated oven and roast for 20-30 minutes, or until the internal temperature reaches 135°F (57°C) for medium-rare.
- Remove from the oven and let it rest for 10-15 minutes before slicing.
- Garnish with fresh herbs and serve.
Notes
- Use a meat thermometer for accurate cooking.
- Letting the meat rest is crucial for juiciness.
- Pair with your favorite sides for a complete meal.
Nutrition
- Serving Size: 4 oz
- Calories: 250
- Sugar: 0g
- Sodium: 600mg
- Fat: 15g
- Saturated Fat: 6g
- Unsaturated Fat: 8g
- Trans Fat: 0g
- Carbohydrates: 0g
- Fiber: 0g
- Protein: 26g
- Cholesterol: 80mg